Tesla Model 3 Performance 2019
|
|
|
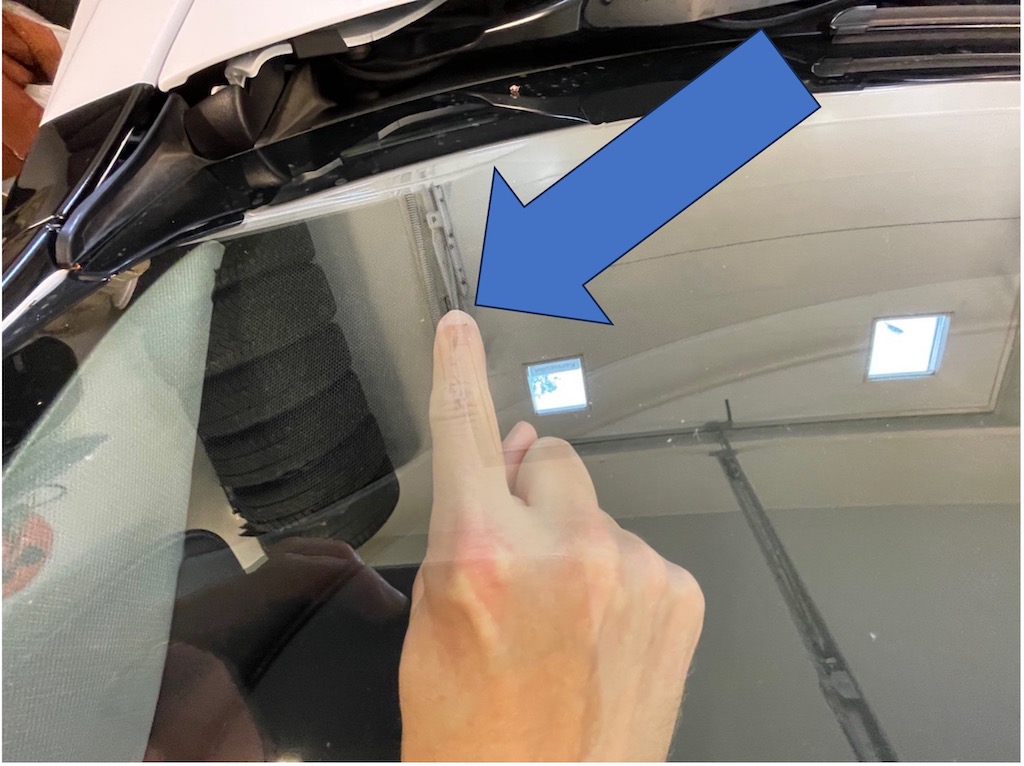
My Tesla Model 3 Performance started making an annoying rattling noise
when driving on bumpy roads and cobblestone streets. This happened at
around 30,000 kilometers. The sound came from the dashboard, the source was on the left side of the speaker grille. When I put my finger there, the rattling stopped. I found out that other people on Tesla forums have the same issue, so I decided to make a DIY guide on how I fixed it myself and what things to consider when doing the repair. |

|
I hadn't previously removed a Tesla's upholstery. As a first-timer, this
was a 3-hour project for me.
Tesla Model 3 is assembled in a way that accessing the speaker grille
is not directly accessible. It requires
removing some other upholstery parts as well. In this project, it's
good to have a
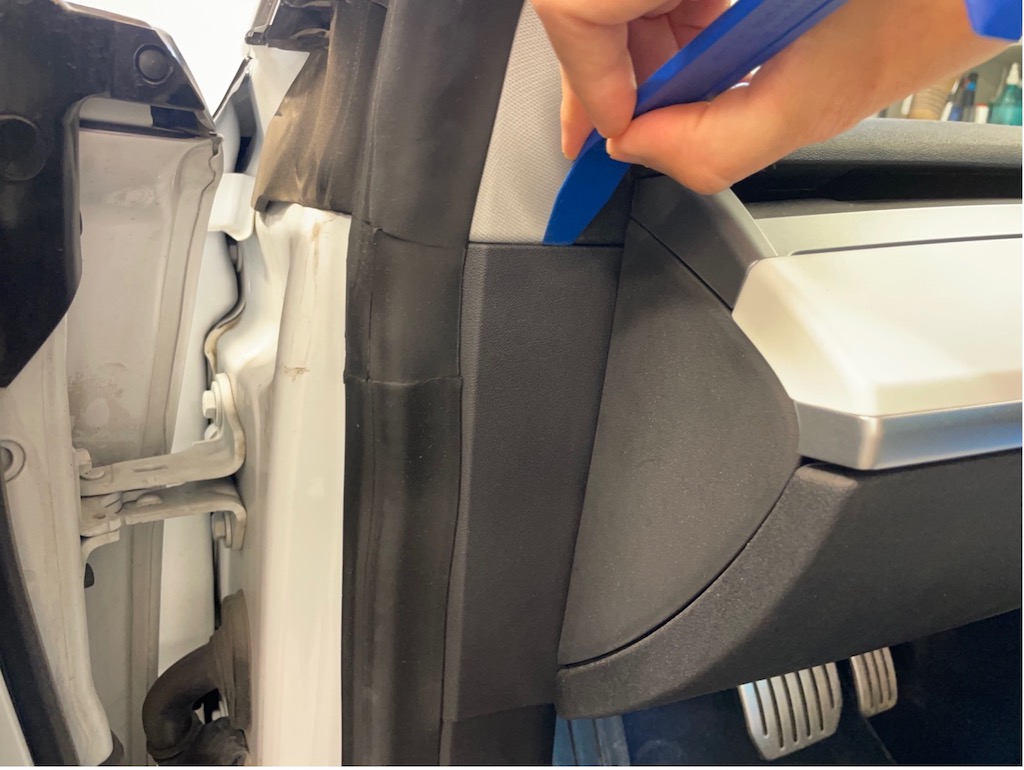
plastic tool set designed for removing upholstery and trim fasteners. The work begins by removing the plastic door that is located on the driver's side of the dashboard. |
|
The door comes off by placing a plastic wedge at the top edge of the door and using it to pry open the clip located on the top of the door. |

|
It is not necessary to remove the door seal in this project. If the seal
is on the way, it can be
pushed aside using the plastic tool or finger. The plastic door pivots on the hook that is on the lower part of the door and the door comes off. |

|
After that, we will remove the plastic door on the passenger side too. |
|
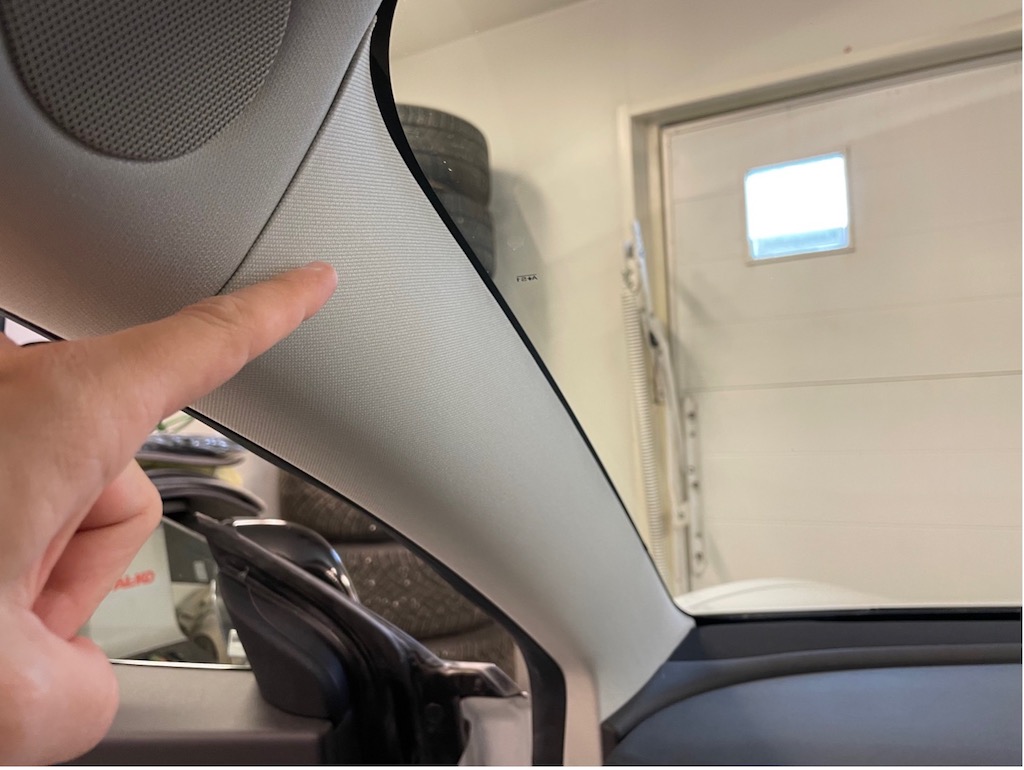
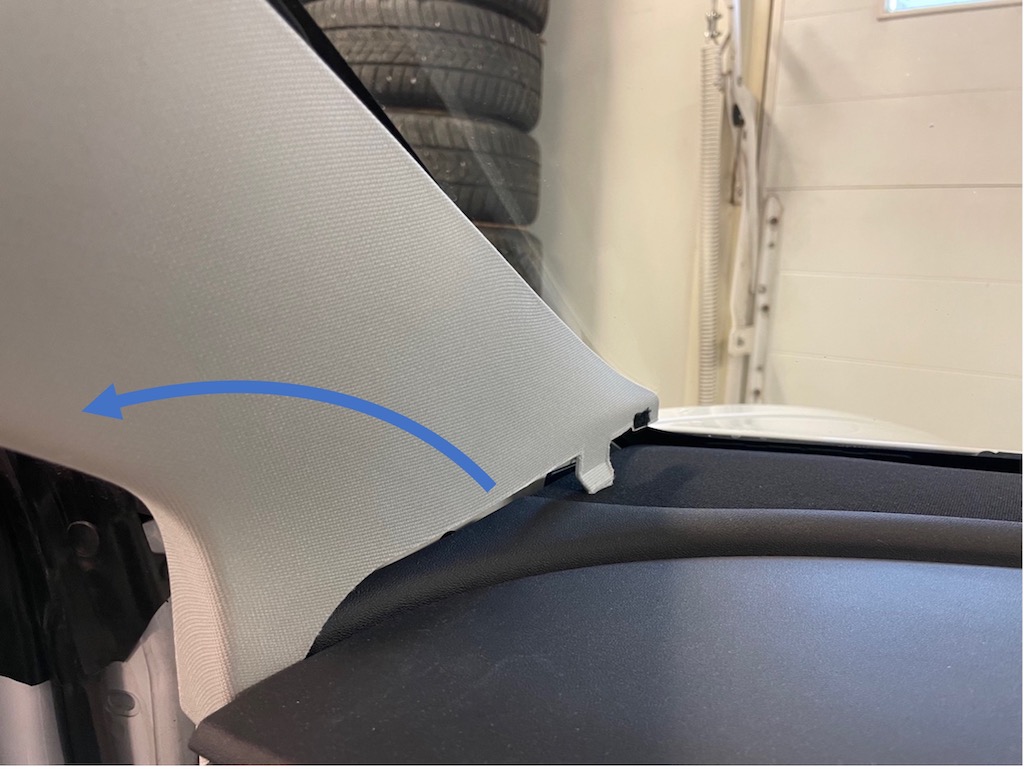
Next, it is time to remove the A-pillar trim panels. Same as with the plastic doors, the removal of these trim pieces also starts from the top. The A-pillar trim is held in place by a metal clip, a total of 3 plastic pins, and a plastic string-like attachment. Additionally, the trim piece is attached to the end of the dashboard with a shaped design that forms a kind of hook. |
|
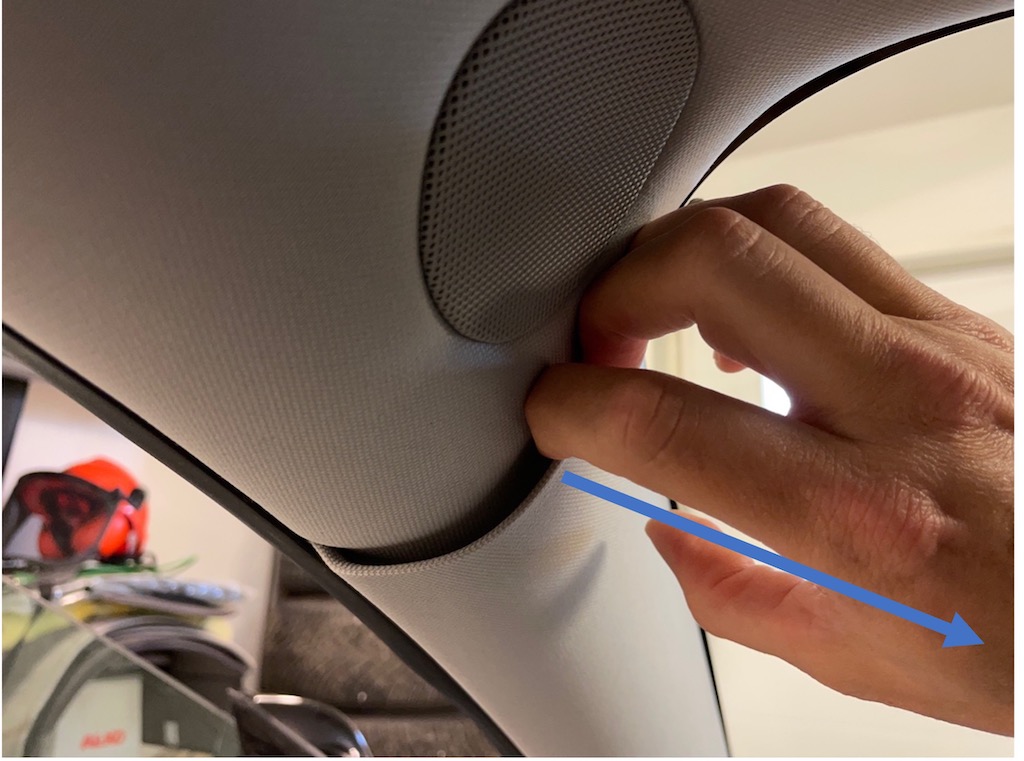
The trim can be partially loosened using a trim removal tool,
to create enough space to insert your fingers. After that, simply give it a firm pull, following the arrow in the picture, towards the centerline of the car. This will open the largest fastening pin. In the process, the other two pins may also come loose. If they don't open, another pull will likely open them as well. My recommendation is to do this removal using your fingers rather than a tool. |
|
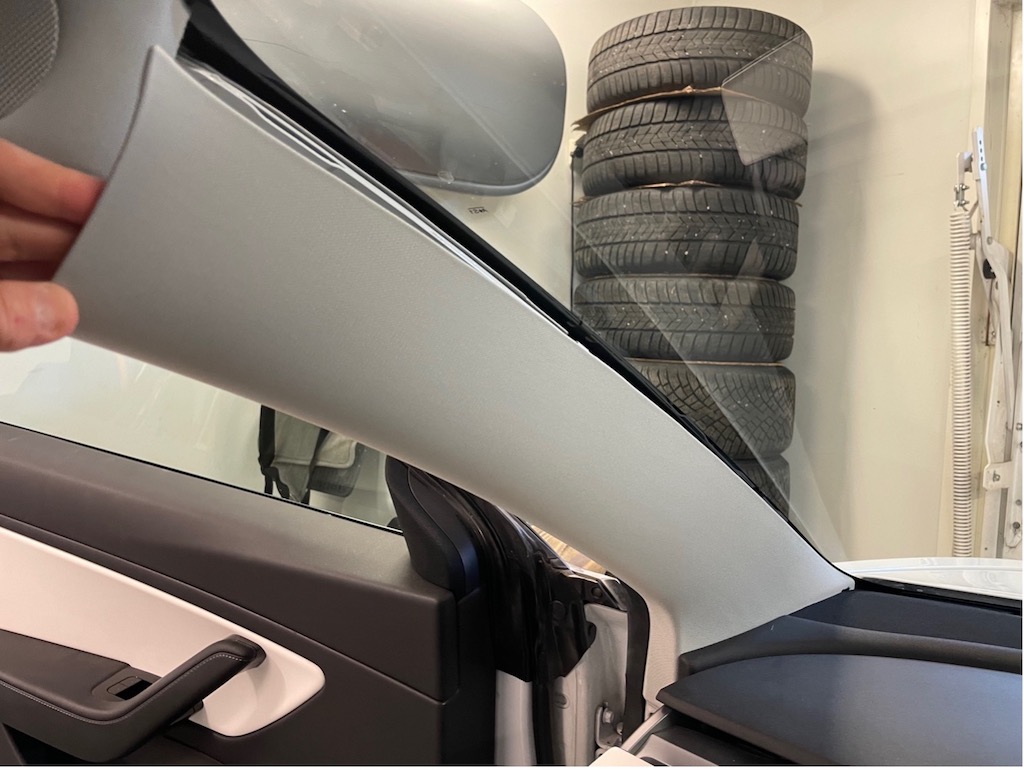
Then,you can rotate the trim from the top towards the door sill. This will release the trim from the dashboard. |
|
When the trim is detached from the clips and hooks, it will be hanging on a plastic string. |

|
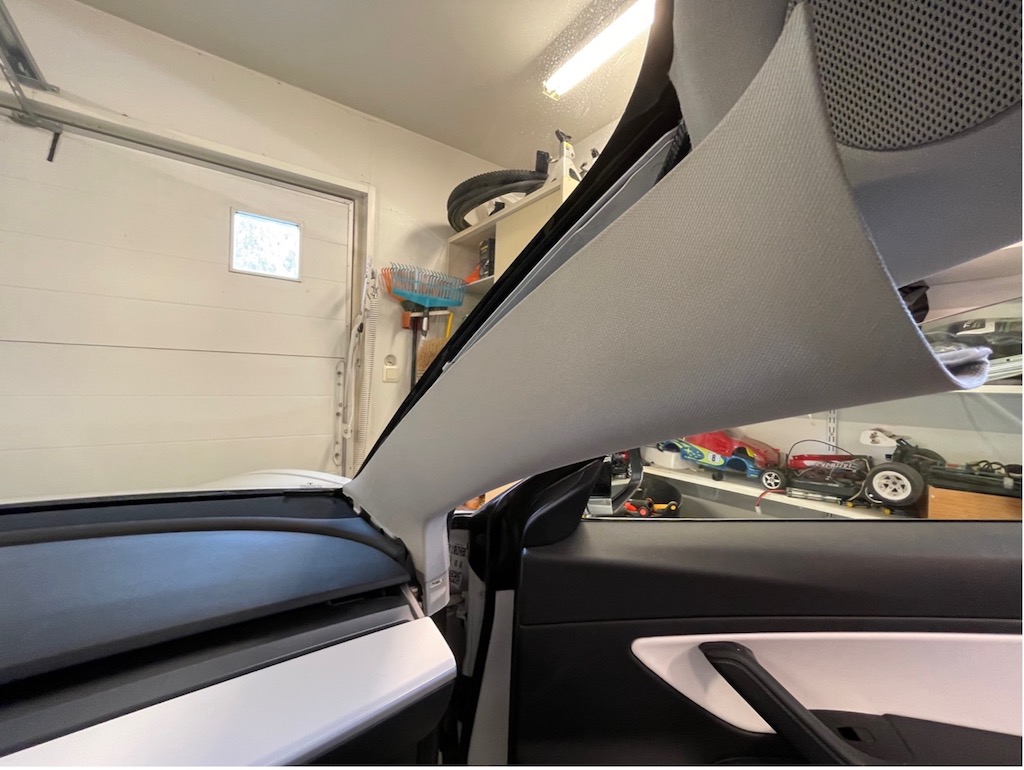
The string has two hooks that can be released by twisting the string 90
degrees.
|

|
Getting the string off may require some patience, but eventually, the
string will come loose.
|

|
Now we have the A-pillar trim in our hands. In the picture, you can
see
all the fasteners behind the trim panel.
|
|
Then we will repeat the same procedure on the other side. |
|
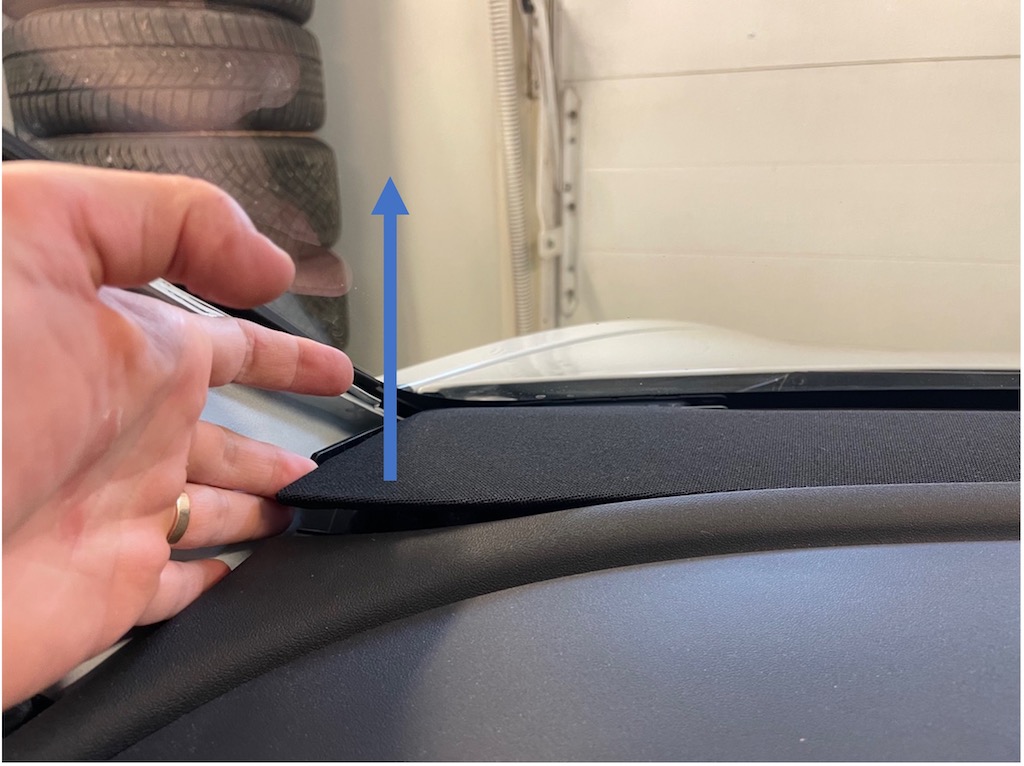
Now that the A-pillar trims have been removed, we can proceed to removing the speaker grille that is on top of the dashboard. Removing the grille is quite easy and can be done using only your fingers: Grip it from the corner and lift it upward, the first clips holding the grille will open quite easily. |

|
The remaining clips can be easily opened by running your finger between
the dashboard and the grille. Once all the clips are released, you can lift the speaker grille. The grille is quite loose in its structure. Be careful not to scratch the dashboard while taking it out from the car. |

|
When the grille is removed, it's a good to examine its structure and attachments because while removing this part is easy, putting it back requires (either good luck or) a lot of patience. |

|
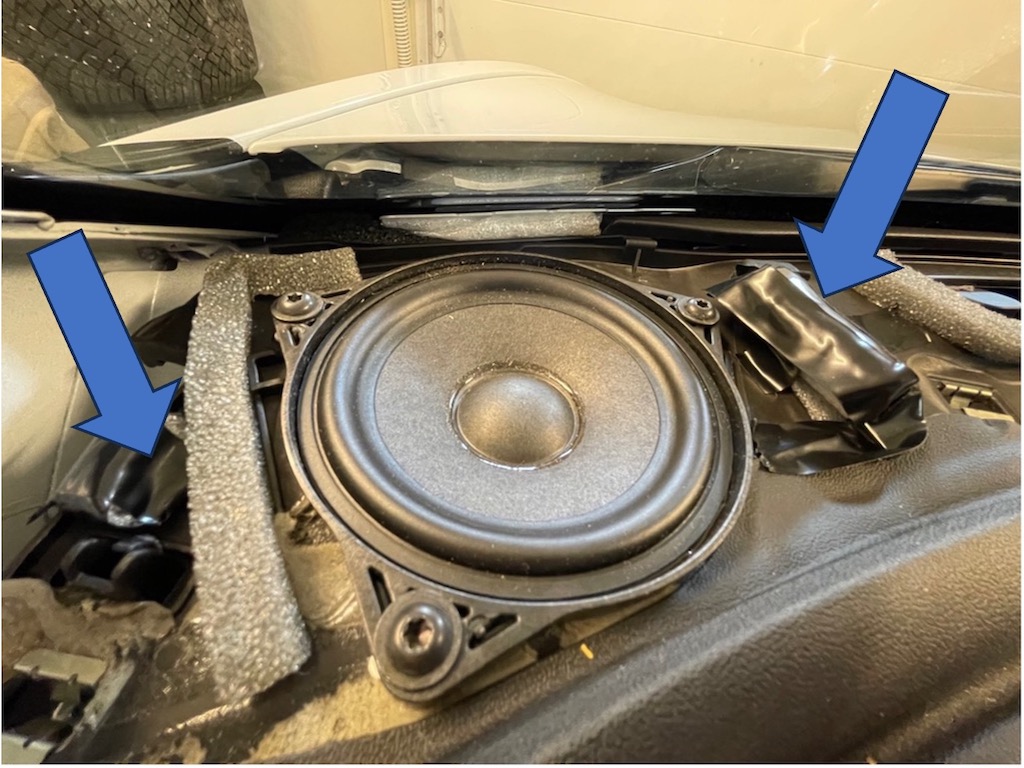
Now that the grille is removed, we can address the rattling
issue. The rattling noise can come from one, two, or three different sources, all of which can be fixed now. Tap your finger on the plastic near the speaker, and you will likely hear the rattling sound. In my case, I assume this was the primary source of the rattling. |

|
This rattling is caused by the plastic of the dashboard touching the metal at the bottom of the window. |

|
You can place foam or some sponge material in between. After doing this, tap on the plastic again with your finger and listen to check if the rattling sound has disappeared. |

|
If the rattling has stopped, push the material as firmly as possible between the plastic and the metal to ensure a good fit. |
|
Another source of rattling could be the speaker grille that we previously
removed; to eliminate any potential rattles from it, add additional
padding to the indicated areas shown in the picture. The third source could be the speaker element. Now that the speaker's screws are easily accessible, we can use a Torx screwdriver to make sure that the speaker's screws are tightened. |
|
After that, we can put the disassembled parts back together in reverse
order, and
then
we are ready for a test drive. Putting the disassembled parts back is generally straightforward, except for the installation of the speaker grille. While installing it, I noticed the following things:
| |
[Back]