Mercedes-Benz S203
|
|
|
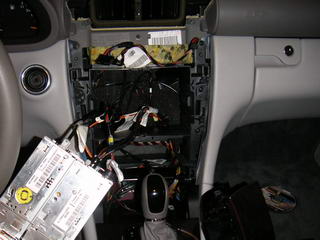
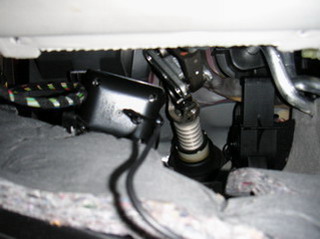
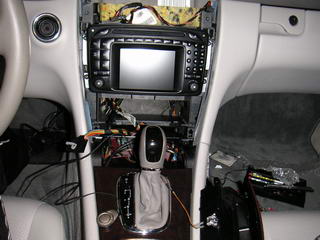
First, you need to open the dashboard as illustrated here. As soon as you have removed the radio or COMAND unit, locate the cable batch, which contains a thick red cable with a blue stripe (constant 12V). There is some tape around this batch.
|
|
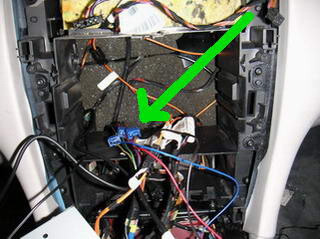
Remove the tape and tap the Nokia harness to Mercedes wires as follows: 1) Blue Nokia wire to back and yellow Mercedes wire (Ignition). 2) Red Nokia wire to the thick red and blue Mercedes cable (12V). 3) Black Nokia wire to brown Mercedes wire (Ground).
|
|
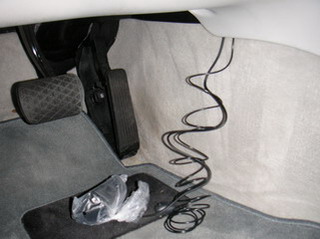
There is no audio mute in the COMAND unit. It is also not available in Audio 30 radio. Because of this, I left the telephone mute (yellow Nokia wire) disconnected. Next, we will route the Nokia speaker cable and Nokia microphone cable from the driver's footwell to the area behind the radio.
|
|
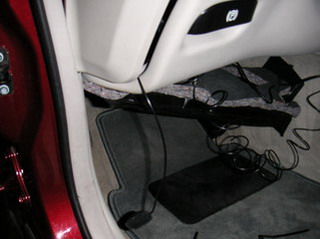
Next, take a T15 torx screwdriver and open the panel under the dashboard in driver's footwell.
|
|
Find a good location for the Nokia speaker on the element. Fasten it there with cable ties, and make sure there is nothing to cause extra clatter or rattle, when you put the panel back to its place.
|
|
There is a door in the end of the dashboard. Open it, and run the microphone cable from the footwell to the door.
|
|
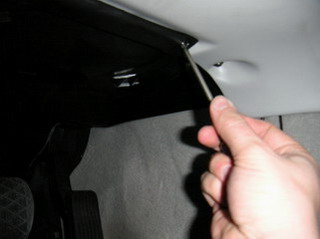
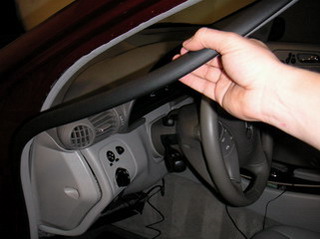
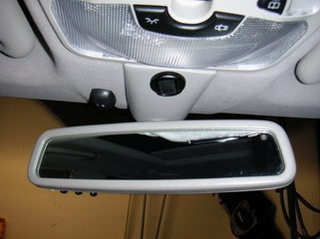
Now, we need to run the microphone cable to next to the rear mirror. Remove the door seal simply pulling it out. Place the cable under the door seal, and put the seal back.
|
|
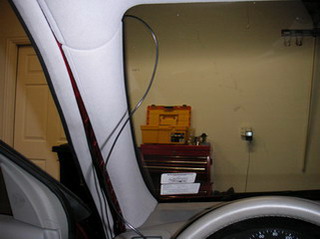
There is a place in the A pillar, where the pillar upholstery connects to the roof. Run the microphone cable here to the top of the windshield.
|

|
Place the microphone to as close as possible to its final place. Check that you have not too much but not too little cable running from the dashboard to the rear mirror. After this we can connect the Bluetooth unit to the Nokia harness, and the speaker, microphone, and controller to the Bluetooth unit.
|
|
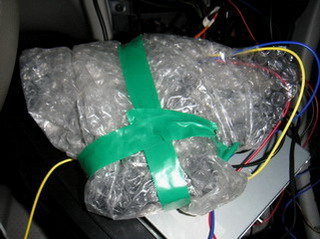
Test all Nokia and Mercedes functions to make sure everything works perfect. If everything looks great, wrap the Bluetooth module to some bubble to avoid any rattles, and place it behind the radio/ COMAND unit. I pushed my CK-1W unit a bit further, to a slot, which can be found between the center console and glove box.
|
|
Next, route the control button cable to the ash tray. Make sure everything is fine behind the radio/ COMAND, and put the unit to its place.
|
|
Put some velcro behind the microphone, and place it to its final place. Close the door in the end of the dashboard, put the footwell panel back to its place, and put the center console back together.
|
|
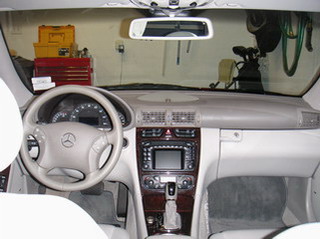
Finally, route the controller cable nicely from the ash tray next to the gear shift. Put some velcro behind the control button, close the wood panel, and place the controller to its final place. And we are done!
|
[Back]